
Grace Notes


Showing posts with label winter. Show all posts
Showing posts with label winter. Show all posts
January 01, 2012
A Christmas Day Birthday
This is a duplicate post as it is both a birthday card and a Christmas theme card. You can read all the details on how I made it on my blog, HERE.

This will be my last Christmas post for 2011. However, I will continue to add Christmas posts to this blog throughout the year, just not as often.

This will be my last Christmas post for 2011. However, I will continue to add Christmas posts to this blog throughout the year, just not as often.
I'd like to take this opportunity to wish you all a
Happy and Blessed New Year.
Welcome 2012!
~ Grace
December 03, 2011
Winter Branches - Practically FREE!
Snowy, frosty branches are lovely all through the winter. The sweet red cardinal adds a touch of Christmas.

From the brush pile to a place of honour in my dining room, these spruced up branches were the perfect accent. In thinking of an arrangement for a corner of my dining room, I decided I wanted something tall and not too fussy. In previous years, this plant stand held an arrangement of poinsettias at Christmas time, and the flowers get changed with each season.
 |
| Some branches after priming. |
I shopped around for some pretty branches and decided I could easily make the perfect thing from what I already had available. After staring at the branches on the brush pile and noticing how graceful some of them were, I got the idea to pretty them up and display them inside. Yes, they are Christmassy but I will keep these out for the entire winter.
After snipping several branches and pruning away unwanted stray parts, I brought them inside and gave them a good cleaning with damp paper towels. Then I took them outside to prime them with Krylon spray primer. I have to say, the product was disappointing for this project. It just did not cover no matter how many coats I sprayed.
 |
| Primed and drying |
I ended up using some fabulous ceiling paint that worked wonderfully well; high coverage and quick drying. I applied the paint with a sponge brush. Then I set all the primed branches in my lovely tall vase (a gift I was anxious to use) and let them dry thoroughly.
I tied a green ribbon around the green glass vase just to see if I liked the look. It was kind of woodsy but I liked it. My plan was to add white mini twinkle lights for sparkle, but I didn't like the green wires and could not find the minis with white wires. Besides, my container is glass and would show all the messy wires.
Sparkly Snow Needed
Although the matte white branches looked nice, I still wanted them to sparkle or to look more "snowy". The snow I tried didn't make any impact.
After trying various methods of applying glitter, I still wasn't satisfied with the look. Then I hit on the best solution. I wanted ICE CRYSTALS! But no one sells a product to give this look. Soooo....
Here is my solution.

I covered select areas with Mod Podge and sprinkled a mixture of epsom salts and glitter over it. This was a little messy but I knew immediately that it was the look I was going for! I LOVE it!


I beefed up the bow with a wider white sparkly ribbon. And happily, I found the perfect red bird for my branches. He was already in my Christmas tree ornament stash.
Cost and Materials
Green glass vase - free (gift from my sister who got it from Good Will)
Paint - free (ceiling paint I already had, but any white matte paint would do)
Krylon spray primer - $5.00 but was not needed
Martha Stewart glitter - free (already had it, but any white glitter would do)
Ribbons - free (already had both green and white)
Red bird - free for me but would've been a couple of bucks
Mod Podge - free as I already had it but I paid $4.47 at Hobby Lobby.
Don't you love it when a plan comes together? It makes me happy to give new life to these old branches, and I love the finished display.

November 23, 2011
Happy Holly Days ~ Using One of My Free Graphics

The cards are 5-1/2 x 4-1/4 with a white base.
 |
| Printed Tags |
I printed several graphics at once, using a table layout in Word. Then I printed a sheet of this one graphic, copying it a few times in Word.
After printing in draft mode, I now had a map of where to place my cut frames. These were done on the Gypsy and shadow pieces were cut from black at the same time. The frame I chose is from A Child's Year but you could use any frame you like. There are so many good ones.
To get the printing onto these cut pieces, I use double-sided Scotch tape that is easily removed after printing. This works very well in holding the pieces in place while they go through the printer. I have done this trick many times with my Epson 835 printer. You might want to test your printer on just one graphic before trying several on a page.
My Technique: Printing on Shapes
After printing in draft mode, I now had a map of where to place my cut frames. These were done on the Gypsy and shadow pieces were cut from black at the same time. The frame I chose is from A Child's Year but you could use any frame you like. There are so many good ones.
To get the printing onto these cut pieces, I use double-sided Scotch tape that is easily removed after printing. This works very well in holding the pieces in place while they go through the printer. I have done this trick many times with my Epson 835 printer. You might want to test your printer on just one graphic before trying several on a page.

I punched a wide border, leaving a 1-inch plain section. This is where I embossed the winter house. Then I glittered the trees and house with MS glitter. The pics don't clearly show the sparkle but believe me, it shines!
By the way, I can't take credit for planning to leave a wide enough border to emboss. I had punched one long piece quite awhile ago, while testing my new punch. It just so happened that I left an inch on the other side. Another one of those happy accidents. Some call it "serendipity" when that happens. I call it a blessing yet to be discovered.
Holly Card
Using the same white base and inside verse as the card above, this card made up quickly. The holly paper is an 8-1/2 x 11" sheet, easily cut into four.

These cards made up so quickly, I almost felt guilty for not spending much time on them. The hardest part was already done in creating the graphic.
 Inside
I composed the verse for the inside, and in Word created a text box placing it in just the right spot. Then I added small holly graphics to coordinate with the card fronts.
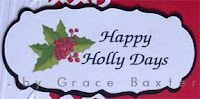 About This Graphic
I have never liked the phrase, "Happy Holidays". Being Canadian, that always seemed like a strange thing to say. You see, we celebrate our Thanksgiving in October, so by Christmas, it's... well, (like the title of my blog says) "It's All About Christmas". If someone says "Happy Holidays" to me, it sounds like a cop out. I always want to ask, "which holiday -- Groundhog Day? Or Valentines? No, no. In Canada, we don't have to guess about which holiday we are celebrating. For Christians, it is Christmas and only Christmas." And of course, our Jewish friends would celebrate Hanukkah, with all of their own traditions. As Christians, we know that Jesus came from Jewish lineage and He is our Saviour, too. He is the reason for the season, as they say.
So how did I come up with the wording for this graphic? I assure you, it was not so as to be politically correct. Holly Days are all about festivities and decorating for Christmas. And all the days leading up to and including Christmas, are Holly Days. It's my new way of saying "Deck the halls". Get it? Love it! So in this context, I am okay with "Happy Holly Days" as it differentiates itself from the secularism of a celebration bereft of Christian values. I just wanted to clear that up.
So help yourself to the Happy Holly Days graphic on my Downloads page in Collection #2, and see what you can do with it. It's a fair size, so I have scaled it down somewhat for this card. I wanted to be generous with these graphics so you would have flexability in how you could use them. There is SO much fun to be had!

By the way, I can't take credit for planning to leave a wide enough border to emboss. I had punched one long piece quite awhile ago, while testing my new punch. It just so happened that I left an inch on the other side. Another one of those happy accidents. Some call it "serendipity" when that happens. I call it a blessing yet to be discovered.
Using the same white base and inside verse as the card above, this card made up quickly. The holly paper is an 8-1/2 x 11" sheet, easily cut into four.

These cards made up so quickly, I almost felt guilty for not spending much time on them. The hardest part was already done in creating the graphic.

I composed the verse for the inside, and in Word created a text box placing it in just the right spot. Then I added small holly graphics to coordinate with the card fronts.

I have never liked the phrase, "Happy Holidays". Being Canadian, that always seemed like a strange thing to say. You see, we celebrate our Thanksgiving in October, so by Christmas, it's... well, (like the title of my blog says) "It's All About Christmas". If someone says "Happy Holidays" to me, it sounds like a cop out. I always want to ask, "which holiday -- Groundhog Day? Or Valentines? No, no. In Canada, we don't have to guess about which holiday we are celebrating. For Christians, it is Christmas and only Christmas." And of course, our Jewish friends would celebrate Hanukkah, with all of their own traditions. As Christians, we know that Jesus came from Jewish lineage and He is our Saviour, too. He is the reason for the season, as they say.
So how did I come up with the wording for this graphic? I assure you, it was not so as to be politically correct. Holly Days are all about festivities and decorating for Christmas. And all the days leading up to and including Christmas, are Holly Days. It's my new way of saying "Deck the halls". Get it? Love it! So in this context, I am okay with "Happy Holly Days" as it differentiates itself from the secularism of a celebration bereft of Christian values. I just wanted to clear that up.
So help yourself to the Happy Holly Days graphic on my Downloads page in Collection #2, and see what you can do with it. It's a fair size, so I have scaled it down somewhat for this card. I wanted to be generous with these graphics so you would have flexability in how you could use them. There is SO much fun to be had!

November 21, 2011
Quick Snowman Card
EASY and Cute

I rediscovered this little guy on the Stretch Your Imagination cartridge. It's a very simple process to follow the example in the front of the SYI handbook. It's an older design but I still think it's pretty cute. Be sure to check out my latest DOWNLOADS... FAMILY TAGS.
Snowmen Always Welcome!
 |
| Snow People Family |
Here are some of my other Snowmen Christmas cards. SO many cute styles to choose from.
Cartridge used: Winter Woodland
See details on the post Snowman Family


Chubby Snowman Christmas Card
See details on the post: Chubby Snowman Card
Cartridge used: Christmas Cheer

~ Grace
November 01, 2011
Cheery Christmas Tags
BRING ON CHRISTMAS!

I'm getting a start on my Christmas tags with a variety of themes, all done in the traditional colours of Red, White and Green. My mind was swimming with ideas and I could barely focus on just a few ideas when I finally came up with these. More are on the way.
I Love Skates

Ever since I was a girl I have always loved white figure skates. I used to be quite a good skater, and would stay out in the freezing cold, skating for hours until I could no longer feel my toes or my nose.
What does that have to do with cards? Only that who we are comes out in the things we create.

These skates are cut from two different cartridges: Winter Woodland and Joys of the Season. All shapes are cut at size 3. Notice the jingle bell on the red and white tag? I ALWAYS used to put jingle bells on the toes of my skates. It was so much fun to hear them jingling as I skated around the outdoor rink. Skates are so bare without them!

Holly and Vellum
There always needs to be a touch of holly. This little card is 3x3". The window is backed with swirly vellum.
This was cut using the card feature with another layer for green leaves. Then I added some coarse green glitter to the edges and red rhinestones for the berries. I used a small stamp for the "Fa la la's" and added a red ribbon for attaching to a gift.

Juggling Snowmen
This is such a cute cut from the JOTS cartridge. I used the positive and negative cuts from the snowmen and it gave me two tags. On the green tag, the ornament top is painted with MS silver paint marker. You can see the reverse one on the left shows a bit of the silver paint around the cutout stars. I call it "star glow".
A Tag For Every Bag
Gold Stars


 I loved this bag with its penguin carolers. And I was so excited to find the perfect penguin for a matching tag on the Christmas Cheer cartridge.
 The size of the penguin is about 2-1/2.


 I cut a square of blue for the front.
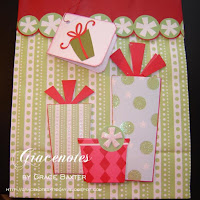

If you love the designer look of gift tags that match their bags, create your own using your Cricut and a little imagination. Last year, I bought some nice gift bags, but their tags were scimpy little squares of paper, so I made all new tags and cards.

First up... Gold Stars. This gift card allows plenty of room inside for your "To" and "From". I cut the card from white using Joys of the Season.
I then painted over the stars using MS gold glitter paint. I like the look of a frosty window, and I didn't want the writing inside to show through too easily. So, to make the cutouts less open I added a small piece of vellum behind the window.

On the inside, I punched a small hole for the gold cord. The finished gift card ended up looking far more elegant than I thought it would!
Penguin
 I loved this bag with its penguin carolers. And I was so excited to find the perfect penguin for a matching tag on the Christmas Cheer cartridge.
I know this cartridge is an older one but it still has some terrific shapes on it. Actually, even though there have been many Christmas carts since this earlier one, Christmas Cheer can't be beat.
 The size of the penguin is about 2-1/2.
His feet and beak are cut from white and painted with gold glitter paint.
The eyes of the penguin are actually cut out, so I decided to shadow the whole penguin in white. That way, I could add blue eyes (a small dot of blue MS glitter paint against the white).
This little guy sure made the happy recipient smile.
Fashion Boot

I picked up this gift bag especially for my daughter. She's a shoe lover. I didn't know what kind of tag I'd be able to find or make, at the time.
Several weeks later, I came across a pad of sticky notes that were the exact same boot design! It was one of those "meant to be" things.
I'm sorry I don't remember which cartridge I used for the "to" and "from" but there are many that have these cuts.

Closeup of tag.
Ornament

This bag uses very non-traditional colours so it was good that I was able to create a gift card that matched.
The blue is almost a baby blue. I started with a 6" x 3" piece of white cardstock, folded in half for a 3x3 card.
 I cut a square of blue for the front.
The ornament is from Christmas Cheer cut at about 2-1/2".
For this one I decided to use an eyelet for the cord to go through. It looks a lot more polished than to just have an empty hole.
And to make the tag match with the others on the bag, I added some glitter around the ornament.
Gift

These little cards are so simple and quick to make. When I look through my cartridges I see endless possibilities in Christmas designs.
Many cartridges have various gifts. This one is from Christmas Cheer because it best matches the gifts on the bag.

I rounded off the corners using a punch. I think this one is from Creative Memories.
Once again the card size is 3"x3". I inked around the edges in red to mimic the other gifts.
A punched hole and piece of red cording finish it off.
A-Caroling We Will Go
Tri-Shutter Card with Music Theme

These happy little carolers are all decked out in their winter finest. At first glance you might think this card may be too difficult or time-consuming. Actually, it is neither!
What MAKES this card is the fabulous cardstock. You have to start with the best. I love The Winter Wonder Stack from DCWV. (No, they aren't paying me to say that.) The crisp stock is the perfect weight, and I can't even tell you how hard it was deciding which designs to use. They are all wonderful -- some smooth, some shiny or glittered.

Winter Frolic is the perfect cartridge to pair up with these papers. I usually search through my cartridges and choose cuts from a few different ones. But this time I stuck with just Winter Frolic. It was everything I needed!

Begin with a tri-shitter card. Directions are available on Youtube. Just search for "tri-shutter card". I recommend testing the cuts on cheap plain paper if you've never done one of these before. But seriously, it's very easy. I like to add a personalized message, prepared on my computer and placed on the back of the card.
Happy Cardmaking!

Christmas Chapel
O Come, All Ye Faithful
October 26, 2011

I loved making this card. I imagined music coming from this country church as townsfolk joyously greeted one another and began singing those old, familiar Christmas carols. In fact, I can picture exactly what the inside looks like.
A center aisle with rows of wooden pews on each side and at the front a platform that has a piano on one side, and a real Christmas tree on the left, all decorated. There are candles on the window sills of each window and wreathes hung over the windows. How do I know all this? I have sung in many such churches over the years; most of them are white but every bit as charming.
The card base is white, with a black mat on top and then the bright Christmas green as a frame. For the snowy background, I used snowflake vellum over white cardstock. Then I created mounds of snow from swirly white and added blue to the edges for definition.
The evergreen trees and rooftop are laden with thick snow. To the cutout windows I added a sheer golden vellum which makes the church come alive. (The windows glow in the picture below.)

And what could be more welcoming on Christmas Sunday than a giant wreath hung on the church front? I prepared the sentiment on my computer, then punched the banner ends with MS lace punch.
Inside:

I created the verse on my computer and printed it on cardstock. and punched the corners to make it lacy. Before gluing it down, I embossed the green mat with rows of holly branches.
Cartridges Used:
Sweethearts - church
Winter Woodland - trees
October 28, 2011
A-Caroling We Will Go


What MAKES this card is the fabulous cardstock. You have to start with the best. I love The Winter Wonder Stack from DCWV. (No, they aren't paying me to say that.) The crisp stock is the perfect weight, and I can't even tell you how hard it was deciding which designs to use. They are all wonderful -- some smooth, some shiny or glittered.
Winter Frolic is the perfect cartridge to pair up with these papers. I usually search through my cartridges and choose cuts from a few different ones. But this time I stuck with just Winter Frolic. It was everything I needed!

Begin with a tri-shitter card. Directions are available on Youtube by many bloggers. I recommend testing the cuts on cheap plain paper if you've never done one of these before. But seriously, it's very easy. I like to add a personalized message, prepared on my computer and placed on the back of the card.
Happy Cardmaking!

November 23, 2010
NOEL - A Wintery Scene

Here is another elegant card, suitable for a man but also pretty enough to give a woman. My first Noel card features a shiny deer, icy snowflakes and a sparkly sentiment.
The snowflakes are combinations of various snowflakes from Winter Woodland and Joys of the Season, layered.
Note about Snowflakes:
Snowflakes should always have 6 points. For this reason I had to eliminate some of the snowflakes on the JOTS cartridge. A flower may have 5 points or petals, but not a snowflake.
Card size is 5"x5".

Snowflakes on the front are cut at various sizes, the largest being 2-3/4". Since I used the Personal sized Cricut which can only cut at half-inch intervals, I may have used the shadow feature to make them a bit larger than 2-1/2". Make sense?
For the glitter, I used a combination of MS white glitter and crystal glitter paint from DecoArt. Because of the embossed background, all the cuts are popped with dimensionals.
The deer is size 2-1/2 cut from a heavy card stock that looks like brushed nickel. I shadowed him in black. I used thick dimensionals for the deer so he would sit higher than the popped snowflakes. Layering the elements in this fashion gives greater dimension.

Inside Card
I composed the verse in Word and printed it on white CS, then matted it on the same burgundy CS as the front.
I cut snowflakes at smaller sizes, frosted them with glitter and created a mini replica of the front for the inside top panel.
The "NOEL" sentiment on the card front was done with purchased sparkly letters.
There you have it... my first Noel card. I'm very pleased with the way it turned out.
November 08, 2010
Cheery Christmas Tags
BRING ON CHRISTMAS!
 I'm getting a start on my Christmas tags with a variety of themes, all done in the traditional colours of Red, White and Green. My mind was swimming with ideas and I could barely focus on just a few ideas when I finally came up with these. More are on the way.
I Love Skates
 Ever since I was a girl I have always loved white figure skates. I used to be quite a good skater, and would stay out in the freezing cold, skating for hours until I could no longer feel my toes or my nose.
What does that have to do with cards? Only that who we are comes out in the things we create.
 These skates are cut from two different cartridges: Winter Woodland and Joys of the Season. All shapes are cut at size 3. Notice the jingle bell on the red and white tag? I ALWAYS used to put jingle bells on the toes of my skates. It was so much fun to hear them jingling as I skated around the outdoor rink. Skates are so bare without them!
 Holly and Vellum
There always needs to be a touch of holly. This little card is 3x3". The window is backed with swirly vellum.
This was cut using the card feature with another layer for green leaves. Then I added some coarse green glitter to the edges and red rhinestones for the berries. I used a small stamp for the "Fa la la's" and added a red ribbon for attaching to a gift.
 Juggling Snowmen
This is such a cute cut from the JOTS cartridge. I used the positive and negative cuts from the snowmen and it gave me two tags. On the green tag, the ornament top is painted with MS silver paint marker. You can see the reverse one on the left shows a bit of the silver paint around the cutout stars. I call it "star glow".
I Love Skates
What does that have to do with cards? Only that who we are comes out in the things we create.
There always needs to be a touch of holly. This little card is 3x3". The window is backed with swirly vellum.
This was cut using the card feature with another layer for green leaves. Then I added some coarse green glitter to the edges and red rhinestones for the berries. I used a small stamp for the "Fa la la's" and added a red ribbon for attaching to a gift.
This is such a cute cut from the JOTS cartridge. I used the positive and negative cuts from the snowmen and it gave me two tags. On the green tag, the ornament top is painted with MS silver paint marker. You can see the reverse one on the left shows a bit of the silver paint around the cutout stars. I call it "star glow".
Subscribe to:
Posts
(Atom)
About Me

Subscribe To


 Posts
All Comments
Posts
All Comments