
Grace Notes


November 01, 2011
That One Gift

A Tag For Every Bag
Gold Stars


 I loved this bag with its penguin carolers. And I was so excited to find the perfect penguin for a matching tag on the Christmas Cheer cartridge.
 The size of the penguin is about 2-1/2.


 I cut a square of blue for the front.

If you love the designer look of gift tags that match their bags, create your own using your Cricut and a little imagination. Last year, I bought some nice gift bags, but their tags were scimpy little squares of paper, so I made all new tags and cards.

First up... Gold Stars. This gift card allows plenty of room inside for your "To" and "From". I cut the card from white using Joys of the Season.
I then painted over the stars using MS gold glitter paint. I like the look of a frosty window, and I didn't want the writing inside to show through too easily. So, to make the cutouts less open I added a small piece of vellum behind the window.

On the inside, I punched a small hole for the gold cord. The finished gift card ended up looking far more elegant than I thought it would!
Penguin
 I loved this bag with its penguin carolers. And I was so excited to find the perfect penguin for a matching tag on the Christmas Cheer cartridge.
I know this cartridge is an older one but it still has some terrific shapes on it. Actually, even though there have been many Christmas carts since this earlier one, Christmas Cheer can't be beat.
 The size of the penguin is about 2-1/2.
His feet and beak are cut from white and painted with gold glitter paint.
The eyes of the penguin are actually cut out, so I decided to shadow the whole penguin in white. That way, I could add blue eyes (a small dot of blue MS glitter paint against the white).
This little guy sure made the happy recipient smile.
Fashion Boot

I picked up this gift bag especially for my daughter. She's a shoe lover. I didn't know what kind of tag I'd be able to find or make, at the time.
Several weeks later, I came across a pad of sticky notes that were the exact same boot design! It was one of those "meant to be" things.
I'm sorry I don't remember which cartridge I used for the "to" and "from" but there are many that have these cuts.

Closeup of tag.
Ornament

This bag uses very non-traditional colours so it was good that I was able to create a gift card that matched.
The blue is almost a baby blue. I started with a 6" x 3" piece of white cardstock, folded in half for a 3x3 card.
 I cut a square of blue for the front.
The ornament is from Christmas Cheer cut at about 2-1/2".
For this one I decided to use an eyelet for the cord to go through. It looks a lot more polished than to just have an empty hole.
And to make the tag match with the others on the bag, I added some glitter around the ornament.
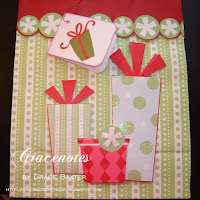
Gift

These little cards are so simple and quick to make. When I look through my cartridges I see endless possibilities in Christmas designs.
Many cartridges have various gifts. This one is from Christmas Cheer because it best matches the gifts on the bag.

I rounded off the corners using a punch. I think this one is from Creative Memories.
Once again the card size is 3"x3". I inked around the edges in red to mimic the other gifts.
A punched hole and piece of red cording finish it off.
A-Caroling We Will Go
Tri-Shutter Card with Music Theme

These happy little carolers are all decked out in their winter finest. At first glance you might think this card may be too difficult or time-consuming. Actually, it is neither!
What MAKES this card is the fabulous cardstock. You have to start with the best. I love The Winter Wonder Stack from DCWV. (No, they aren't paying me to say that.) The crisp stock is the perfect weight, and I can't even tell you how hard it was deciding which designs to use. They are all wonderful -- some smooth, some shiny or glittered.

Winter Frolic is the perfect cartridge to pair up with these papers. I usually search through my cartridges and choose cuts from a few different ones. But this time I stuck with just Winter Frolic. It was everything I needed!

Begin with a tri-shitter card. Directions are available on Youtube. Just search for "tri-shutter card". I recommend testing the cuts on cheap plain paper if you've never done one of these before. But seriously, it's very easy. I like to add a personalized message, prepared on my computer and placed on the back of the card.
Happy Cardmaking!

Subscribe to:
Posts
(Atom)
About Me

Subscribe To


 Posts
All Comments